Tufting a flower or a geometric pattern is fun, but weaving a human face with all its depth into a rug is a true test of mastery. Portrait rug tufting isn't just about punching yarn through fabric; it's about accurately analyzing light, shadow, and anatomical lines.
In this guide, you'll learn how a photograph is transformed into a tufting template and the critical details to watch out for during the process. Welcome to this challenging yet fascinating journey where art meets yarn.
1. Digital Preparation of the Photo
Everything starts with a high-quality reference photo. To make a portrait tuftable, it needs to go through a process called "posterization." This reduces the complex color transitions in the photo into distinct, sharp color blocks.
- Vector Tracing: Separate the photo into layers using Illustrator or similar software to highlight shadows and bright areas.
- Color Count: For beginners, an ideal palette is between 3 to 5 colors (such as Black, Dark Gray, Light Gray, and White).
Project the image onto your tufting cloth in reverse (mirrored).
Draw the main features first, such as the eyes, nose, and lips.
Start filling with the darkest tones and work your way to the lightest ones.
2. Critical Details in Portrait Tufting
When tufting a portrait, "dense tufting" is the most important rule. Gaps between the yarn can weaken the facial expression.
Eyes and Expression Management
The soul of a portrait lies in the eyes. Tufting that tiny white glint in the pupil makes the portrait look "alive." For these fine details, you should set your tufting gun to single-stitch mode or, if necessary, make manual adjustments using a punch needle.
Directional Tufting: Tufting along the natural curves of the face (like the cheekbones) creates a more natural texture in the finished rug. When tufting hair, try using curved lines that follow the flow of the hair rather than just vertical lines.
3. Color Theory in Skin Tones
Human skin isn't just one solid color. Where the light hits, there are yellow and pink undertones, while shadows are dominated by purple and brown hues. However, working in "monochrome" (shades of a single color) for portrait rugs often yields much more professional and aesthetic results.
4. The Finale: The Art of Carving
When the tufting is done, the portrait will still look rough. What turns it into a work of art is the carving stage. Using a rug trimmer, you should do the following:
- Separating Colors: "Carve" the borders where different color blocks meet with scissors or trimmers to add depth.
- Leveling the Surface: Shave the entire surface of the rug to an even level for a smooth, clean finish.
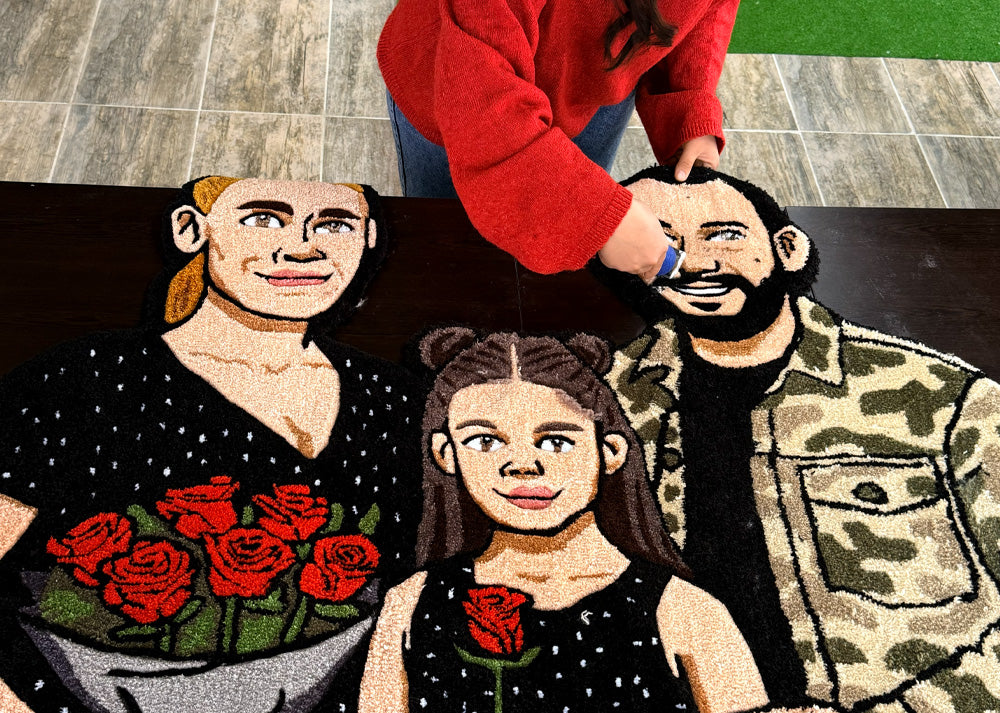
5. The Value of a Portrait Rug
Depending on its size, tufting a portrait rug can require anywhere from 30 to 70 hours of labor. While the material cost (yarn, cloth, latex) is the same as an average rug, the mental effort and craftsmanship involved are significantly higher. In the handmade market, the sheer artistic value and intense labor of a professional portrait rug can easily command a craftsmanship premium of $180 to $370.