Tufting Blog

Inspiring Tufting Rug Patterns and Design Ideas: The Most Popular Trends
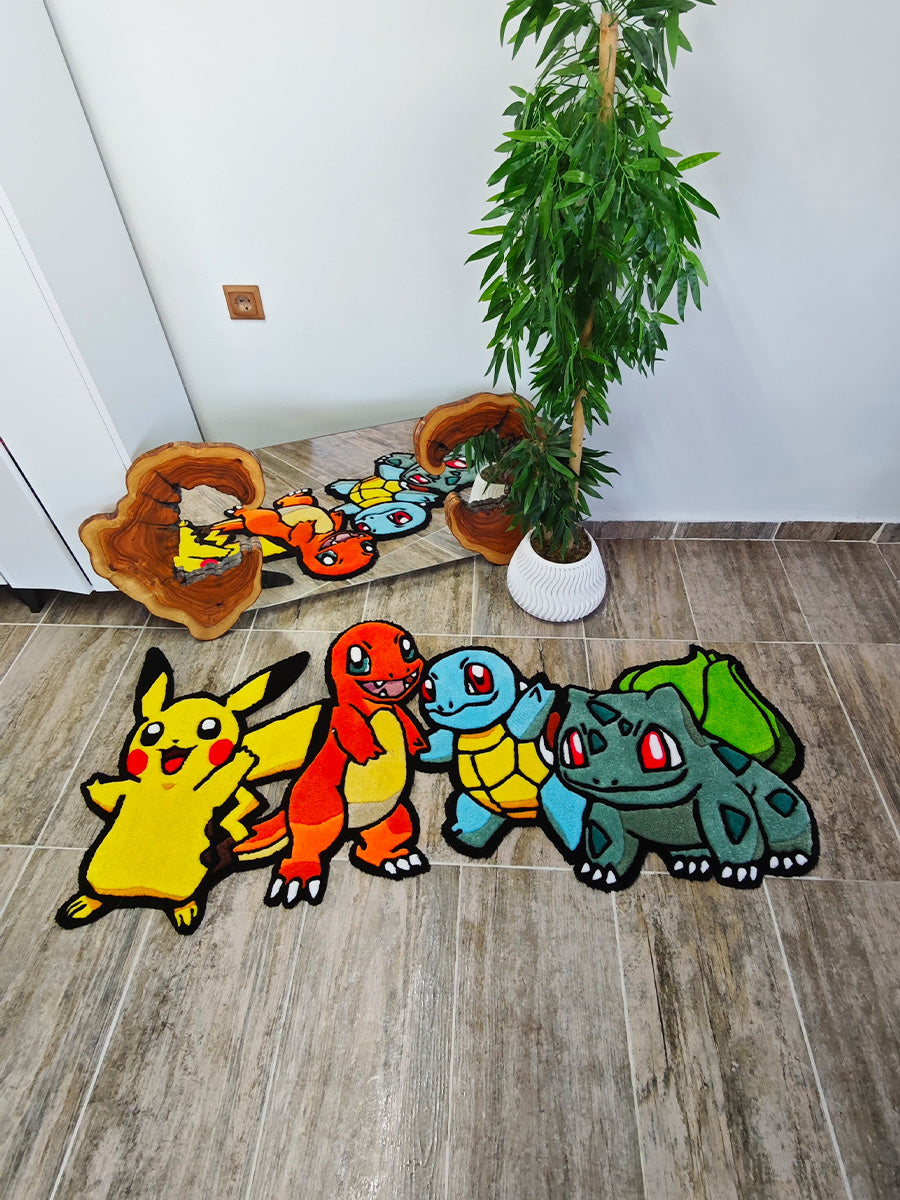
A blank tufting cloth is like a painter's canvas; your imagination is the only limit. But sometimes, staring at that blank white fabric and thinking, "What should I make?" can totally block your creativity. Don't worry! Here at GG Tufting, we've rounded up the trendiest patterns, color combinations, and design ideas for 2025 and 2026, ranging from beginner-friendly to advanced to get your creative juices flowing. 🔥 1. What's Trending Right Now? Abstract & Organic No sharp corners, no rules. Amorphous shapes, often called "blobs," and overlapping color blocks are hugely popular right now. Trending Palette: The 70s Retro Wave Wavy checkerboard patterns, mushrooms, groovy flowers, and funky fonts. The nostalgia wave is going strong. Trending Palette: Anime & Characters Rugs featuring favorite cartoon or anime characters. This is the most requested category for teen bedrooms and gaming rooms. Trending Palette: 📐 2. Think Outside the Rectangle The best part about tufting is that you aren't tied to standard rug shapes. "Die-cut" or custom-shaped rugs can completely transform a space. Amorphous (Blob) Ideal for under coffee tables. Arch Great for mirror frames and walls. Geometric Perfect for modern offices. 🎓 3. Choosing a Design Based on Your Skill Level If you're just starting out, a highly complex pattern might discourage you. Here is your roadmap to success: Level 1: Beginner Forgiving Pattern: Large color blocks, fried egg designs, simple flowers. Why: No fine details, which means beginner carving mistakes aren't noticeable. Level 2: Intermediate Requires Focus Pattern: Typography (rugs with words), logos, multi-colored waves. Why: Requires gun control on curved lines and making sure to "mirror" or flip your text before tufting. Level 3: Master Precision Work Pattern: Realistic portraits, highly detailed anime characters, subtle shading. Why: A single wrong line can ruin a facial expression. Requires advanced carving and shading skills. 💡 4. Pro Tips to Make Your Design Shine 🎨 The 60-30-10 Color Rule:If you struggle with picking colors, try this designer rule: 60% of the rug should be your dominant color (usually the background), 30% the secondary color (large patterns), and 10% an accent color (fine lines, borders, or dots). Play with Texture: Your rug doesn't have to be the exact same height everywhere! You can create a 3D texture by using both Cut Pile and Loop Pile techniques on the same rug. For example, in a floral pattern, the leaves could be looped while the flower petals are cut pile. If the muse has visited you, now is the time to load up your gun and take action!
Learn moreThe Ultimate Home Decor Trend: What is Tufting and Why is it So Popular?
Have you been seeing colorful, fluffy, and uniquely shaped rugs all over Instagram, TikTok, or modern home decor magazines lately? Welcome to the world of Tufting. What started as a viral pandemic hobby has now exploded into a global home decor trend and a highly profitable business model. Let's dive deep into the art of tufting from the GG Tufting perspective. 🤔 1. What is Tufting? The word "tuft" refers to a cluster or bunch of threads. In rug making, tufting is the art of shooting yarn through a tightly stretched canvas (backing cloth) at high speeds using a specialized tufting gun. "Unlike traditional weaving, tufting doesn't involve tying knots. The yarn is punched through the fabric and secured from the back with adhesive. This makes the production process 10 times faster and offers limitless design freedom." 📈 2. Why Did Tufting Blow Up Overnight? The rise of this craft is no coincidence. The perfect storm of social media algorithms and the DIY (Do It Yourself) culture skyrocketed tufting to the top. The Rise of Tufting Popularity (Representative Chart) 2019 2020 2022 2024+ ❤️ 3. Why Do People Love Tufting? 🧠 Therapeutic Effect Working with colors and repetitive motions clears the mind and creates a meditative, calming effect. 🎨 Ultimate Creative Freedom You aren't stuck with standard rectangular rugs. You can create a cloud, an anime character, or any abstract shape you can imagine. 🚀 Fast Results While traditional rug weaving takes months, you can finish your very own tufted piece in just one day. 💸 Business Potential Custom-designed rugs can be produced at a low cost and sold with high profit margins. ⚖️ 4. What's the Difference? Feature Traditional Weaving Tufting (With a Gun) Speed Very Slow (Months) Very Fast (Hours/Days) Learning Curve Steep (Requires Mastery) Easy (Anyone Can Learn) Cost High Accessible Shape Usually Rectangular Any Shape is Possible (Die-cut) 🏠 5. How is it Used in Home Decor? Tufting isn't just about rugs for the floor. It has evolved into a versatile art form for modern homes. Wall Hangings: Soft, acoustic pieces of art hung on walls instead of traditional paintings. Mirror Frames: Transforming ordinary mirrors by wrapping them in fluffy, colorful frames (Fluffy Mirrors). Mug Rugs: Miniature tufted pieces that add a pop of color and texture to your coffee table. Pillow Covers: Textured, 3D pillows that make any sofa pop. Tufting has moved beyond being just a passing trend; it has become the most colorful way to express personal style.
Learn moreCan You Wash a Tufted Rug? Care, Cleaning, and Longevity Tips
You've noticed your soft, colorful tufted rug is looking a little dirty. Your first instinct might be to toss it in the washing machine. Stop! Handmade rugs don't share the same makeup as mass-produced, machine-made rugs. In this guide, backed by GG Tufting expertise, we're sharing the secrets to cleaning your rug without ruining it, ensuring it stays looking brand new for years to come. 🚫 1. Can You Put a Tufted Rug in the Washing Machine? 🛑 NO, NEVER! Washing your tufted rugs in a washing machine will cause irreversible damage. Why Not? The Anatomy of a Rug What holds a tufted rug together isn't stitching; it's Latex Glue. 1. Yarn (Surface) 2. Primary Backing (Monk's Cloth) ⚠️ 3. LATEX GLUE (Water Soluble/Degrades) 4. Secondary Backing (Felt/Non-slip) Excessive water and the tumbling action of a machine will break down the glue in the 3rd layer. If the glue degrades, the yarn will fall out, and the rug will literally fall apart. 🧹 2. Routine Maintenance: Your Cleaning Kit The best approach is to keep your rug clean without washing it. Here are your best friends: 🔌 Low Vacuum Use the brushless attachment on your vacuum cleaner on the lowest suction setting. 🧶 Lint Roller Gently pick up surface dust and pet hair using a sticky lint roller. ✂️ Scissors / Trimmer To snip away any pilling or stray fibers that appear over time. 🧼 3. Accidents Happen: Spot Cleaning Spilled coffee on your rug? Don't panic, and definitely don't rub it! Follow these steps: 1 Blot Use a paper towel to absorb the excess liquid by pressing firmly (never rubbing). 2 Prep Mix lukewarm water with a tiny drop of clear dish soap. Dip a clean cloth into the mixture and wring it out well. 3 Wipe Gently dab the stain from the outside in using the damp cloth. Do not soak the rug. 4 Air Dry Lay the rug flat in a well-ventilated area and let it air dry completely. ⏳ 4. Secrets to Keeping Your Rug Looking Young Keep Out of Direct Sunlight: Constant, direct sunlight will fade the yarn colors and can dry out and crack the latex backing over time. Rotate Regularly: Turn your rug every 6 months. This prevents uneven wear and tear from heavy foot traffic in the same spots. Avoid Moisture: Don't use wool yarn for rugs in damp areas like bathrooms. Moisture causes wool to smell and breaks down the glue. (Opt for acrylic yarn for bathrooms). Shedding is Normal: It’s completely normal for new rugs to shed "excess yarn" for the first few weeks. It's not a defect; it's just part of the crafting process. Regular vacuuming will take care of it. 💡 Pro Tip for Deep Cleaning:If your rug is heavily soiled and spot cleaning isn't enough, take it to a professional carpet cleaner. However, you must explicitly state that it is a "Handmade / Latex-Backed" rug. Steam cleaning and harsh chemicals should never be used. Like all handmade items, tufted rugs require a little extra TLC. With the right care, your rugs made with GG Tufting supplies will remain a cherished piece of your home for years to come.
Learn moreHow to Price Custom Tufted Rugs? (A Complete Pricing Strategy)
When you see a handmade tufted rug, the price might sometimes surprise you. You might think, "Isn't it just a rug?" However, a custom tufted rug is much more than a floor covering; it is a piece of art crafted stitch by stitch. In this post, GG Tufting transparently breaks down the labor and costs behind the price tag, serving both as a pricing strategy guide for makers and an educational piece for buyers. 📊 1. The Invisible Costs Behind the Price Tag The retail price of a rug isn't just the cost of yarn and cloth. In professional pricing, the pie is sliced like this: 40% Labor & Effort (The largest slice) 30% Materials (Yarn, Cloth, Adhesive) 20% Design & Brand (Originality) 10% Overhead Costs (Electricity, Equipment, Shipping) ⏳ 2. The Most Valuable Resource: Time Tufting is not a "push a button and let it run" kind of job. Creating a 1-square-meter (approx. 10 sq. ft.) rug can easily take an average of 15 to 20 hours from design to finish. This process includes: Design Preparation: Digital drawing and tracing via a projector. Tufting: Hours of physically demanding work operating the tufting gun. Gluing and Drying: A 24-hour curing period. Carving: The most detailed stage that gives the rug its professional, 3D appearance. 🧮 3. The Professional Pricing Formula Pricing should be calculated mathematically, not emotionally. For a sustainable business model, use this formula: RETAIL PRICE EQUATION (Material Cost x 2) + (Hourly Rate x Hours Worked) + Profit Margin (20%) *Multiplying material costs by 2 covers hidden expenses (waste, electricity, equipment depreciation). 📈 4. Variables That Affect the Price 🧵 Material Quality There is a significant cost difference between acrylic yarn and 100% wool yarn. Wool rugs are more expensive but are built to last a lifetime. 🎨 Design Complexity The labor time for a solid-color rug versus a rug with 15 different colors and intricate details is vastly different. ✂️ Carving & Sculpting Trimming and sculpting the patterns with scissors to create a 3D effect requires extra expertise and time, which increases the final price. 💎 5. Why is Handmade More Expensive? While factory-made rugs are produced by the meter in minutes, every single loop in a tufted rug is guided by the artist's hands. The customer isn't just buying a rug; they're buying a story. ART & DESIGN VALUE HANDCRAFT & PERSONALIZATION RAW MATERIALS & COSTS 💡 Pro Tip for Sellers:When quoting a price, don't just give the number. Explain the value by sharing details like, "This rug used over 4 lbs of 100% wool yarn and required 6 hours of custom carving to make the design pop." Custom tufted rugs fall into a luxury, boutique category. When combined with the right materials and craftsmanship, they more than justify their price tag.
Learn moreRug Tufting for Complete Beginners: A Step-by-Step Guide
If you've been watching rug tufting videos and thinking, "I can do that!", you're in the right place. While tufting might look complicated from the outside, it's an incredibly rewarding and easy-to-learn craft once you know the right techniques. In this guide, we break down how to make your own rug from scratch with zero prior experience, walking you through every detail up to GG Tufting workshop standards. 🎒 1. Essential Supply List Before you start, embrace the "mise en place" rule (everything in its right place). Missing supplies will interrupt your creative flow. Your Starter Kit Should Include: ✓ Tufting Gun ✓ Tufting Cloth (Monk's Cloth) ✓ Tufting Frame ✓ Acrylic Yarn ✓ Yarn Threader ✓ Rug Backing Adhesive (Latex) ✓ Scissors & Putty Knife 🚀 2. Step-by-Step Tufting Process Stretching the Fabric (The Trampoline Rule) The most crucial rule in tufting is tension. Place your cloth on the frame and attach it to the gripper strips. Pull the fabric tight from all sides until it's "tight as a drum." It should bounce back and make a thumping sound when you tap it. Loose fabric causes the gun to get stuck and will tear the cloth. Transferring and "Mirroring" Your Design Project your chosen design onto the cloth using a projector and trace it with a permanent marker. ⚠️ Critical Warning: Tufting is done from the back of the rug. Therefore, you must MIRROR/FLIP your design before tracing it onto the fabric. This is absolutely vital, especially if your design includes text. Threading the Gun and Getting Started First, feed the yarn through the top hole of the gun, then use a yarn threader to pull it through the eye of the needle. Make sure your yarn cone feeds smoothly; if the yarn gets snagged, it will pull right out of the needle. The Tufting Technique This is where the magic happens! Hold the gun perfectly perpendicular (at a 90-degree angle) to the cloth and press the metal foot firmly against it. If you don't apply enough pressure, the machine will bounce off. ⬆️ THE GOLDEN RULE: DIRECTION Always move the gun from bottom to top (upwards). The needle should lead the way with the foot following behind. Never pull the gun backward. Gluing and Securing When you finish tufting, the yarn isn't secure yet. While the rug is still on the frame, apply a generous amount of Rug Backing Adhesive to the back surface. Use a putty knife or spatula to press the glue deep into the roots of the yarn. Let it dry for at least 24 hours. Finishing and Carving Once the glue is completely dry, cut the rug off the frame. Apply a felt backing for a clean, finished look. Finally, use carpet clippers or sheep shears to even out the stray yarns on the front (carving) for a smooth, professional finish. 💡 GG Tufting Pro Tip:Your lines might be a bit wonky on your first try, and that's totally normal! Start by setting your machine's speed to the lowest setting. It's easy to lose control when going too fast. Outline your shapes first, then fill them in just like a coloring book. Making your own rug isn't just about creating a piece of decor; it's about crafting a story.
Learn morePro Tips for Making Money Selling Tufted Rugs on Etsy
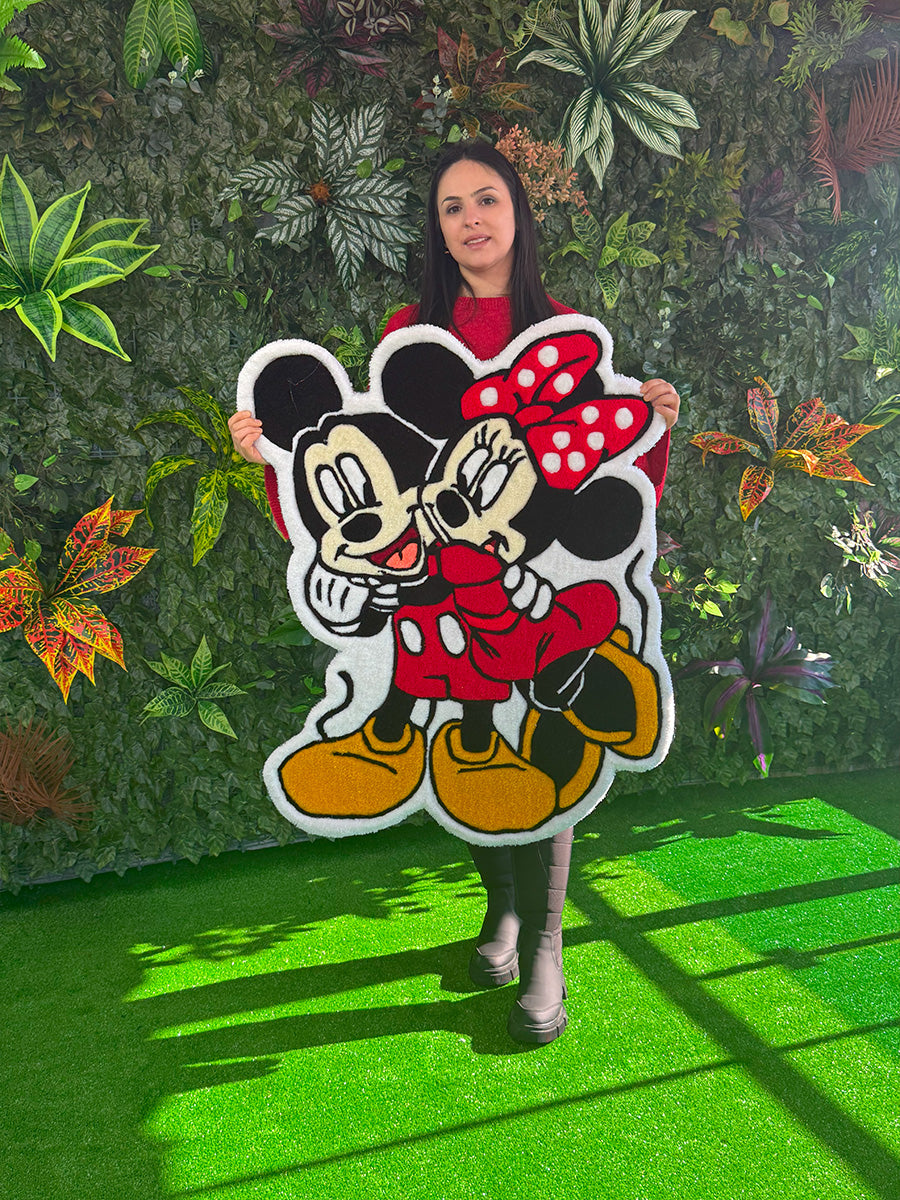
As the premier global marketplace for handmade goods, Etsy is more than just a place to showcase your tufting hobby—it's a serious avenue for generating international income. Customers around the world aren't looking for mass-produced items; they are searching for that unique, handcrafted piece made by you. However, simply "opening a shop and waiting" is rarely enough. In this guide, we at GG Tufting are sharing professional strategies to help you stand out on Etsy, boost your sales, and manage your shipping smoothly. 🎯 1. Finding the Right Niche If you search for "Tufted Rug" on Etsy, you'll see thousands of results. The key to standing out from the competition is focusing on a specific, targeted niche. 🐶 Pet Portraits People love their cats and dogs. Custom pet portraits often command the highest profit margins in the tufting category. 👾 Anime & Pop Culture Character designs are incredibly popular for gaming rooms and man caves. (Just be mindful of copyright laws!) 🪞 Tufted Mirror Frames They are easier to ship and highly sought after in the Home Decor category. 🔍 2. Etsy SEO: The Secret to Visibility If customers can't find your product, they can't buy it. You must use "Long-Tail Keywords" in your titles and tags. The Right Keyword Strategy Rug (Too Broad - You'll get lost) ↓ Tufted Rug (Still Highly Competitive) ↓ Custom Anime Rug for Gamer Room Decor *Always include gift-focused phrases in your tags, such as "Gift for Him" or "Housewarming Gift". 📸 3. Photos Sell the Product In online shopping, the customer can't physically touch the item. Your photos must convey the quality and texture of your work. Cover Photo: It should be clean, well-lit, and clutter-free. The product must be front and center. Texture Shot (Macro): Take close-ups to show off the yarn quality and your carving details. Scale & Proportion: Always include an object for scale—like a chair, a foot, or a person—so buyers understand the actual size. Video: The Etsy algorithm loves video. Add a 10-second clip of you running your hand over the rug. 💰 4. Pricing for Profit Generating sales is great, but Etsy fees, shipping costs, and hidden expenses can quickly eat into your profits. Price your items using math, not emotion. THE ETSY PRICING FORMULA Materials + Labor (Hourly Rate) + Shipping + Etsy Fees (~15-20%) + Profit Margin *Many sellers offer "Free Shipping" by absorbing the shipping cost into the item price. This can increase conversion rates by up to 30%. 📦 5. Shipping & Packaging: First Impressions Your product will likely travel across the country or overseas. Durability is everything. 💡 GG Tufting Tip:Roll the rug tightly and wrap it in thick, waterproof plastic or heavy-duty bubble wrap. Add a "Do Not Bend" warning sticker to the outside. Placing a handwritten thank-you note and a small freebie (like a sticker) inside the package is a proven way to guarantee a 5-star review. 📈 6. Catching the Success Cycle The more you sell on Etsy, the more the algorithm promotes you. Securing those first few sales is critical to kickstarting this cycle. Perfect SEO & Photos ➔ Clicks & Sales ➔ Fast Shipping & Freebie ➔ 5-Star Review ➔ 🚀 Algorithm Boosts You Success on Etsy doesn't happen overnight, but with the right strategy and high-quality production, building a steady income stream is entirely possible.
Learn more
From Hobbyist to Professional Brand: Scaling Your Tufted Rug Production
Making one rug a week is a fun hobby. But when you start getting 20 orders a week, it's no longer just a hobby—it's an operation that needs managing. Scaling your tufting business isn't just about working faster; it's about working smarter. In this guide, we at GG Tufting explore how to transform your studio into a production line and the strategic steps to transition from a hobbyist to a professional brand. 🧠 1. The Mindset Shift: Amateur vs. Professional The first step toward building a brand is changing your perspective on the production process. Feature Hobby Approach Professional Approach Materials Working with yarn skeins Yarn cones and wholesale buying Process One by one (finish one, start another) Batching (Mass processing) Time "Whenever it's done" Optimized minute-by-minute tracking Waste Not tracked Minimized cloth/yarn waste ⚙️ 2. The Batching System The biggest time-saver in mass production is performing the same task for multiple products back-to-back. Don't finish one rug and then start another; break the process down into stages. 1 Batch Drawing: Draw as many designs as you can fit onto a large frame (e.g., 6.5x6.5 ft) at the same time. Fill in any empty gaps with coasters or mug rugs. 2 Color-Based Tufting: Instead of finishing each rug individually, tuft all the black sections for EVERY rug on the frame first, then move on to the white sections, and so on. This cuts down yarn-changing time by 80%. 3 Batch Gluing: Dedicate your evening shift strictly to gluing. Glue the entire frame in one go and leave it to dry overnight. 4 Chain Carving: The next day, cut all the rugs down and move them down the line to your carving station. 🏭 3. Efficient Studio Workflow Your studio needs a "traffic flow." Raw materials should enter at one end, and finished products should exit at the other. Zone A: Prep Projector, primary cloth rolls, and drawing table. This should be a dust-free area. Zone B: Tufting Frames and yarn feeding system (Yarn Wall). Wall-mounted pegs to ensure your yarn feeds smoothly. Zone C: The 'Dirty' Work Gluing, drying, and carving. This area generates the most dust and fumes, so it must be well-ventilated. 💰 4. Supply Chain & Cost Management You can't build a profitable business by buying materials at retail prices. Increasing your profit margins starts with smart purchasing. Cost Analysis: Retail vs. Wholesale Retail Yarn Cost (Skeins) High Cost Wholesale Yarn Cost (Cones) Low Cost + Time Saved *Yarn cones aren't just cheaper; they also provide a continuous feed to your tufting gun, preventing constant stops. 🏷️ 5. Product Standardization & Branding Customers expect consistent quality with every order. "Handmade" shouldn't mean "inconsistent." Backing: Use a custom label with your brand's logo or a custom-printed twill tape on the back of every rug. Quality Control Checklist: Before packaging, every item must be checked for glue odors, shedding yarn, and surface evenness. Inventory Management: Always keep your best-selling colors (like Black, White, and Cream) fully stocked in cones. 💡 GG Tufting Tip:Spare parts are a lifesaver. If your tufting gun breaks on your busiest day, production stops. A professional studio must always have a backup gun and replacement scissors/needles on hand. Turning your hobby into an empire requires patience and strategy.
Learn moreHow to Make a Tufted Rug at Home: The Ultimate Step-by-Step Guide
Does designing and making your own rug sound intimidating? With the right equipment and techniques, tufting is actually one of the most rewarding hobbies you can enjoy from the comfort of your home. Whether you're creating a piece of art for yourself or a unique gift for a loved one. In this guide, we'll walk you through how to make a professional-quality rug from A to Z, right up to GG Tufting studio standards. 🎒 1. Preparation: Setting Up Your Workspace Before you begin, embrace the concept of "mise en place" (having everything in its place). Missing supplies will interrupt your creative flow. ✓ Tufting Gun ✓ Primary Tufting Cloth (Monk's Cloth) ✓ Sturdy Tufting Frame ✓ Yarn (Acrylic or Wool) ✓ Yarn Threader ✓ Carpet Adhesive (Latex) ✓ Scissors & Putty Knife ✓ Projector (Optional) 🚀 2. The Step-by-Step Process Step 1: Stretching the Cloth (The Trampoline Effect) When attaching your cloth to the frame, the golden rule is tension. Secure the cloth to the gripper strips and pull it tight from every direction. It should sound like a drum when you flick it. Loose cloth will cause your tufting gun to bounce and potentially tear the fabric. Step 2: Transferring Your Design Use a projector to display your design onto the cloth and trace it with a permanent marker. ⚠️ ATTENTION: MIRRORINGTufting is done from the back (reverse side) of the rug. Therefore, you must FLIP YOUR DESIGN HORIZONTALLY before tracing it onto the cloth. This is absolutely crucial, especially if your design includes text or letters. Step 3: Time to Tuft Thread your yarn into the gun and turn it on. Here are the golden rules: Apply Pressure: Don't be afraid to press the gun firmly against the cloth. The foot of the machine needs to stay in constant contact with the fabric. Direction: The gun must always move in the direction of the foot (usually bottom to top). Never pull it backward. Speed: Move the machine at a consistent pace. If you move too fast, you might rip the cloth; if you move too slow, the yarn will bunch up. 💡 Pro Tip: Outline your shapes first, then fill in the centers just like coloring in a coloring book. Step 4: Gluing When you finish tufting, the yarn isn't fully secure yet. While the rug is still on the frame, apply a generous layer of Carpet Adhesive (Latex) to the back. Use a putty knife or spatula to work the glue right into the roots of the yarn. Let it dry for at least 24 hours. Step 5: Backing and Cutting Once the glue is completely dry, cut the rug down from the frame. For a clean finish and extra protection, apply a secondary backing cloth (like felt or non-slip backing) to the rear. Fold the excess primary cloth along the edges over to the back and secure it using hot glue or a strong spray adhesive. Step 6: Shaving and Carving This is where the magic happens! Use carpet clippers to level out the uneven yarn on the front of your rug. Define the lines between different colors using scissors (the "V-cut" method) to give your rug a crisp, 3D, professional look. 🌟 GG Tufting Expert Advice Patience is key here. On your first try, your lines might be a bit wonky, or you might struggle to control the gun. That is completely normal! Build up your muscle memory by practicing on small projects, like coasters or mini wall hangings, before tackling a big piece. Making your own rug isn't just about creating home decor; it's about crafting a story.
Learn moreHow to Choose the Best Tufting Yarn? (Acrylic vs. Cotton vs. Wool)
The most important factor that determines the quality, durability, and texture of a tufted project is, without a doubt, the yarn you use. No matter how good your tufting machine is, choosing the wrong yarn can lead to a frustrating experience. So, which one should you choose: Acrylic, Wool, or Cotton? In this guide, backed by GG Tufting expertise, we break down the different yarn types to help you make the perfect choice for your next project. 🧶 1. Yarn Types and Their Characteristics Every yarn type has its own unique character. Here are the three most popular options: Beginner Friendly 🎨 Acrylic (Synthetic) The most popular and accessible option for beginners. With its vibrant colors and affordable price tag, it’s perfect for trial and error. Price Advantage 100% Durability 60% Color Variety 95% Professional 🐑 Wool (Natural) The "Gold Standard" for long-lasting, commercial-grade floor rugs. It is highly crush-resistant, natural, and eco-friendly. Price Advantage 40% Durability 100% Premium Feel 100% Niche ☁️ Cotton (Natural) Typically used for wall pieces and art. It is soft and matte, but it lacks the elasticity and bounce required for a high-traffic floor rug. Price Advantage 70% Durability 50% Softness 90% 📊 2. Quick Comparison Table Feature Acrylic Wool Cotton Best For Wall Hangings, Hobby Rugs Floor Rugs, Luxury Goods Wall Art, Bath Mats Texture / Feel Plastic-like Softness Natural, Dense, and Warm Matte and Flat Maintenance Stains Easily Repels Dirt, Hard to Soil Washable (May Shrink) Cost 💲 Low 💲💲💲 High 💲💲 Medium ⚙️ 3. Yarn Weight and Feeding It's not just the type of yarn that matters; the thickness and how you feed it into the machine are equally critical. The Double Stranding Technique Tufting gun needles have a large eye. Using a single, thin strand of yarn results in a sparse, bald-looking rug and causes the yarn to constantly pop out of the needle. For professional density, you should thread two or three strands simultaneously into your gun. = Dense Rug Yarn Weight: You should generally opt for "Worsted" (Size 4 Medium) or "Aran" weight yarns. Thin crochet threads are completely unsuitable for tufting. Cones vs. Skeins: Whenever possible, use yarn wound on cones. Standard skeins from craft stores can tangle and create tension as the machine pulls. In tufting, tension = the yarn popping out of the needle. 🏆 4. Which One Should I Choose? 💡 GG Tufting Recommends:If you are just starting out: Definitely start with Acrylic. When you make mistakes, it doesn't break the bank. The color palette is endless, and it's much easier to carve with clippers.If you are selling rugs: Use Wool to offer your customers a true "Premium" product. Wool rugs command much higher prices because they can endure heavy foot traffic for years without losing their shape.
Learn moreHow to Build a Winning Tufting Portfolio?
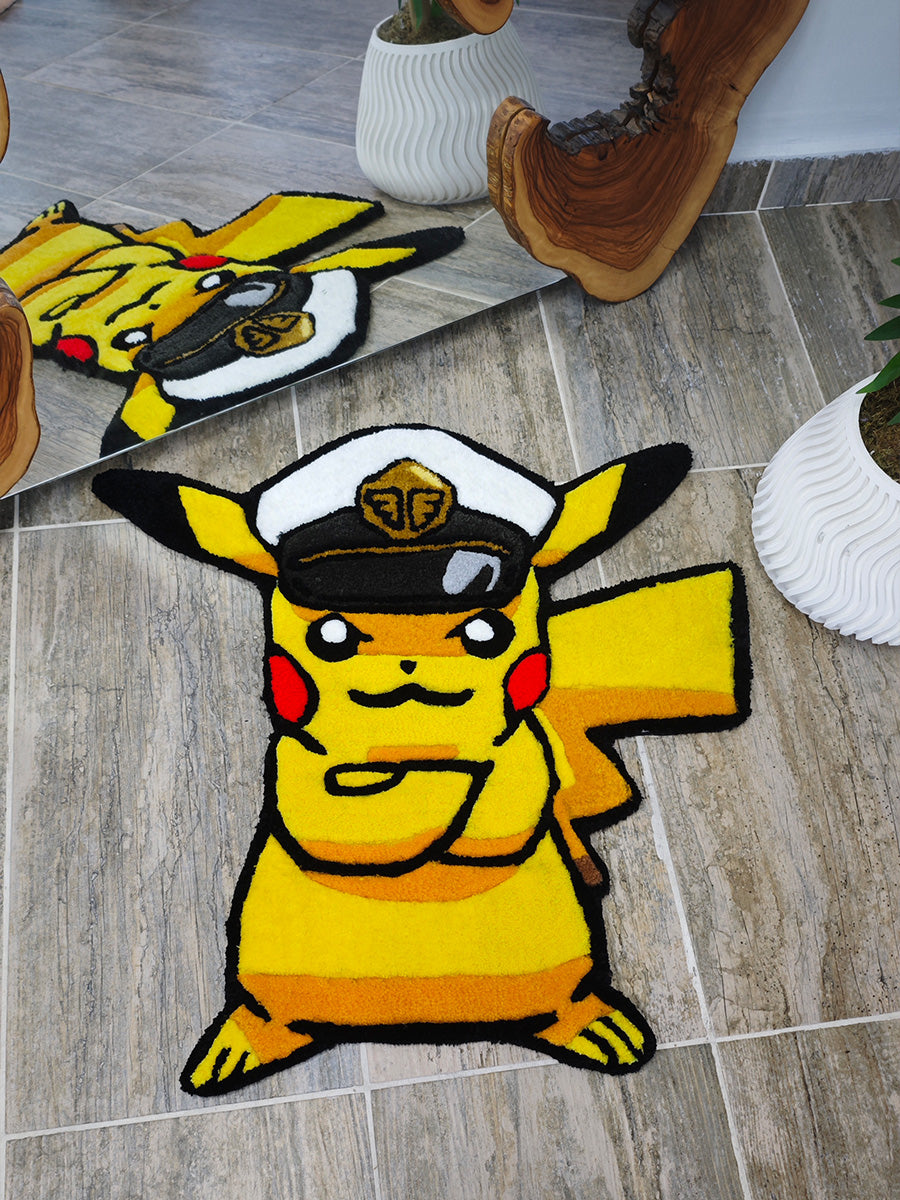
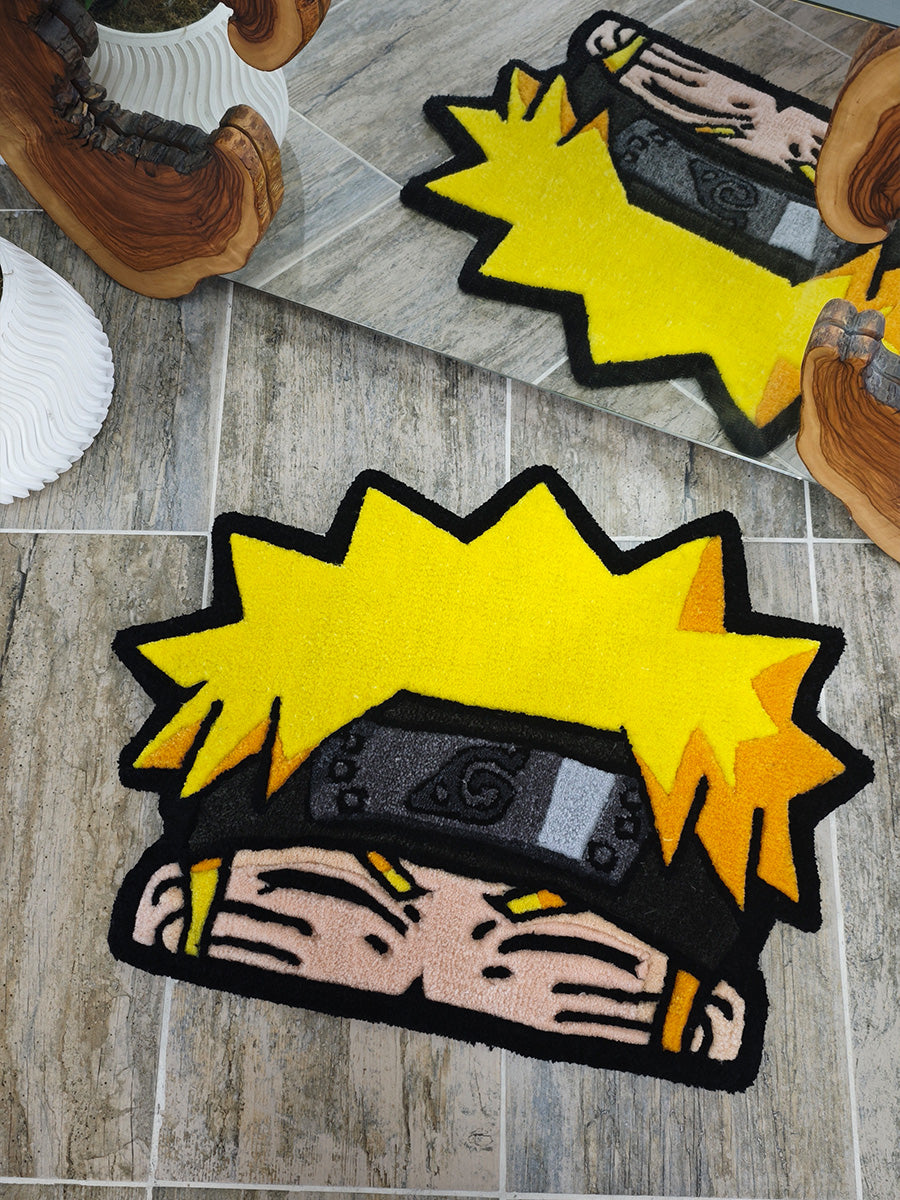
You might have tufted the highest quality rug in the world, but if you can't present it properly, it's as if that rug never existed in the digital world. In tufting, a portfolio isn't just a gallery of "things I made"; it is your strongest sales tool that instills trust in the customer. So, how do you craft that magical portfolio that turns a hobbyist's page into a professional brand? Here are the technical details backed by GG Tufting expertise. 📸 1. Photography: The 3 Golden Angles Your customers can't physically touch the rug. The only data they have when making a purchasing decision are the visuals you provide. You must showcase these 3 angles for every product: 🖼️ The Flat Lay A bird's-eye view on a flat surface. This shows the entire design and its symmetry. Natural light is an absolute must. 🔍 Macro Detail A close-up shot. This proves the quality of your carving (shearing) and the density of the yarn. 🛋️ Lifestyle Shot Take a photo of the rug next to a couch or a mirror. This creates a sense of scale and atmosphere. 🛡️ 2. Building Trust: The Backing & The Process In the tufting world, the biggest detail that exposes an amateur is the back of the rug. Most sellers only show the front. Clean Finish: Show that your waterfall edges (the folded-over borders) are neat and secure. The Process Story: To prove you aren't just "dropshipping" mass-produced items, share Work in Progress (WIP) videos. Brand Tag: A custom label with your logo attached to the back of the rug is the ultimate signature of professionalism. ✅ Portfolio Rules DO THIS DON'T DO THIS Use the same color filter or lighting setup across all photos to create a cohesive aesthetic. Don't post photos taken at night, under yellow bulbs, with heavy shadows that wash out the true colors. Clearly state the dimensions (in inches) and the yarn type (Acrylic/Wool) in the description. Don't force the customer to "DM for price." Be transparent and professional. Only upload your best work. "Less but better" is always more effective. Don't add flawed or crooked practice pieces to your main portfolio. Those belong in your "Stories" as behind-the-scenes content. 📂 4. Digital Organization If you are building a website, categorize your work to help buyers navigate: 📦 Ready to Ship In-stock items ready for immediate dispatch. ✨ Made to Order Designs that you can replicate upon request. 🏛️ Archive / Sold Past work displayed purely for reference and credibility. Most people upload photos directly from their phones. This is a massive SEO mistake. If you want to rank on Google, change the file name: ❌ IMG_4920.jpg ✅ handmade-tufted-rug-pokemon-gengar.jpg Always name your photos using the exact keywords people will type into search engines. A good portfolio is a living organism; update your past work as your skills improve. Properly presenting the amazing pieces you create with GG Tufting supplies is the key to turning your art into a profitable business.
Learn more
How to Make Money Hosting Tufting Workshops
Today, people aren't just buying "products" anymore; they are buying "experiences" they can share stories about. The idea of designing and tufting your own rug has become one of the most popular weekend activities in recent years. We are mapping out how to turn your tufting skills into a highly profitable business model by teaching this art, backed by GG Tufting expertise. 📐 1. Physical Space and Equipment Math Workshop attendees aren't looking for home comfort; they want a professional studio vibe. Using your space efficiently is the key to profitability. 🖼️ Frame Strategy To save space, avoid tabletop frames. Instead, build large, freestanding stations that people can work on from both sides. A 5x5 ft frame means a workspace for 4 people. 📽️ Projectors for Speed Use a digital projector to keep attendees from wasting time drawing. They send their image beforehand, and when they arrive, they can trace it in just 5 minutes. 🔫 Backup Equipment Beginners can easily jam the machines. To keep the workflow uninterrupted, keep at least 1 backup tufting gun ready for every 4 participants. ⏱️ 2. Curriculum Management: The 4-Hour Flow An ideal workshop experience should have a flow that teaches without boring the attendees, guiding them straight to a finished product. First 30 Mins Safety & Test Drive Threading the yarn, holding the gun, and safety rules. Participants should practice shooting straight lines on the edge of the cloth before touching their main design. 2.5 Hours Production Phase Tufting the actual design. As the instructor, you should walk around, correct technical mistakes, and help with yarn feeding. Last 1 Hour Gluing & Wrap-Up Applying latex adhesive to the back. (Pro Tip: Because drying takes time, don't hand the rugs over immediately; offer to ship them or have them picked up the next day.) 💰 3. Revenue Model & Pricing When calculating workshop profitability, you must factor in your time, brand value, and location—not just the raw materials. PROFIT / LOSS STATEMENT (Estimated Per Person) Tufting Cloth + Backing - $10.00 Yarn Consumption (Avg. 3-4 Skeins) - $15.00 Adhesive & Consumables - $5.00 Refreshments & Snacks - $5.00 TOTAL ESTIMATED COST - $35.00 WORKSHOP TICKET PRICE + $150.00 NET PROFIT (Per Person) $115.00 (Over 300% Margin) 📣 4. Marketing & Upsell Opportunities ✓ Starter Kit Sales: At the end of the workshop, ask, "Want to continue this at home?" and offer GG Tufting starter kits at a special discount. The conversion rate is incredibly high. ✓ Content Marketing: Film your attendees while they are having fun and tufting. User-generated content (UGC) is the strongest social proof you can use on social media to sell out your next class. ✓ Bring-a-Friend Discount: Tufting is a social activity. Offering a 10% discount for couples or groups heavily reduces the risk of empty seats. Ready to Build Your Studio? Check out our GG Tufting B2B (Wholesale) solutions for the bulk tufting cloth, wholesale yarn, and heavy-duty machines you need to host a successful workshop. We are here to support your growth as your business partner.
Learn more
How to Set Up Your Own Tufting Studio?
Tufting isn't just a hobby; when set up correctly, it's a production model that can bring in serious income. However, a successful tufting process starts with more than just owning a good gun—it requires building a "fluid" studio layout. Whether you are converting a spare room in your house or a garage, we've prepared the ultimate technical recipe for setting up an efficient, safe, and inspiring tufting studio, backed by GG Tufting expertise. 📍 1. Studio Layout: The 3 Main Zones Setting up a studio isn't just about throwing equipment into a random room. Tufting is dusty, noisy, and requires physical effort. You should divide your space into 3 distinct zones. 🎯 Production Zone The main area where your frame and tufting gun live. This zone needs the best lighting and a smooth yarn feeding system. 🧴 Gluing Zone The smelliest part of the process. You absolutely need a well-ventilated area or a balcony for the latex adhesive to cure properly. ✂️ Carving Station This step generates an unbelievable amount of dust. You need a sturdy table and a strong shop vac nearby. 🛠️ 2. The Ultimate Equipment Checklist ✔ Tufting Frame: The most important criterion is that it doesn't wobble. It can be freestanding or clamped to a table. ✔ Tufting Gun (Cut Pile): The AK-I Cut Pile machine is the most ideal model for beginners. It covers 90% of market demand. ✔ Yarn Winder: Not a luxury, a necessity. If you don't wind your yarn into "cakes," your gun will constantly jam. ✔ Yarn Feeding System: The setup (usually eyehooks) that allows the yarn to flow smoothly from the cakes into the gun. 💰 3. Budgeting: Hobbyist vs. Professional Equipment Beginner (Hobby) Professional (Commercial) Frame DIY Wood (Approx. 30x30 inches) Metal or Heavy Wood (5ft+) Fabric Monk's Cloth (Standard) Premium Gray/White (With Guidelines) Carving Basic Scissors and Clippers Variable Speed Carver + Shearing Guide Transferring Hand Drawing Digital Projector 💡 4. The Unsung Heroes Because tufting is a physically demanding job, ergonomics and lighting are incredibly important. Light Source: A ceiling light isn't enough. Having an LED light shining from behind the frame helps you spot mistakes instantly. Height: The frame should be set at eye level so you don't end up with severe neck pain. 😷 Dust Management Tip:Your studio's biggest enemy is "micro yarn dust." This dust ruins your machines and fills your lungs. Always run an Air Purifier in the room or wear a high-quality dust mask while carving. ⚠️ SAFETY WARNING: Because there are fast-spinning gears on the gun, never wear loose-fitting clothing or long necklaces, and always tie your hair back securely when tufting. Setting up your own studio is the first step toward creative freedom. You can find all the professional equipment you need and get setup support at our GG Tufting store.
Learn more